
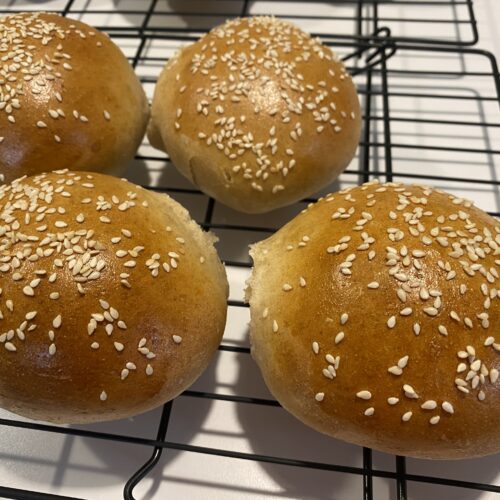
Forget those sad, wimpy styrofoam buns from the store. These Homemade Sesame Seed Buns are built for a beefy burger or pulled-pork sandwich. And they are so easy to make!
Now With Whole-Wheat!
Anyone who follows Baking Naturally knows I always prefer whole-wheat if I can make it work – and this was a no-brainer. Swapping out about half the bread flour for whole wheat created a light, fluffy roll, but with the characteristic nutty flavor of whole wheat.
Homemade Sesame Seed Buns – Tips
Just a few tips and techniques to check out before you get started:
Room Temperature Ingredients
It will help immensely if you use room temperature ingredients. The butter will blend into the flour easily, and you don’t want the dough ball to cool any more than necessary, as it needs to get up to about 75° F to begin rising.
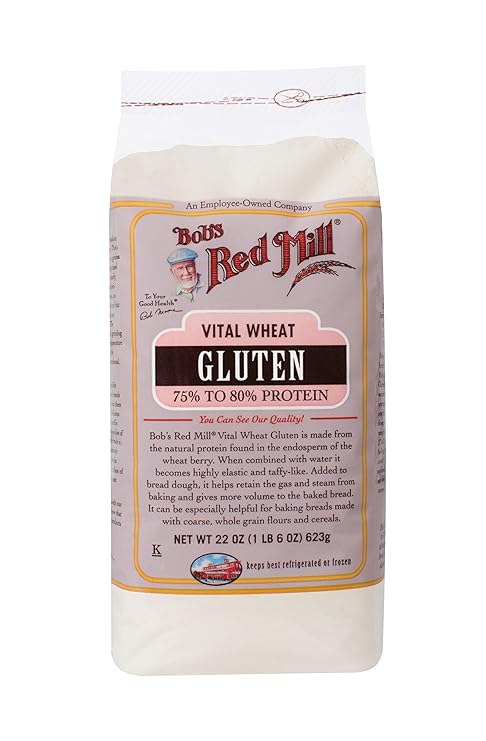
All-Purpose Flour v Bread Flour
I use bread flour when making bread, as it has a higher gluten content which makes for a lighter, fluffier roll – particularly important when using whole wheat flour. To substitute all-purpose flour, you can add a gluten supplement (see below). It takes about 1 teaspoon of gluten for every cup of all-purpose flour.
When Have I Kneaded Enough?
The age-old question, and the answer is “when it feels right.” I wish I could tell you an exact time, but it’s not possible, as it depends on the exact flour you’re using, your climate, etc. Here are some guidelines:
On an electric mixer with a dough hook attachment, I find that once the ingredients are combined and the batter is smooth, kneading time at level 2 takes about 5 to 7 minutes. You’ll notice the dough pulls away cleany from the sides of the bowl, but still leaves a “sticky” spot just on the bottom. But check out this video for more helpful tips using a stand mixer.
If you have a bread machine, you can just dump all the ingredients in and let it process through the dough cycle. If your machine has a proofing warmer, you can even leave it in until you’re ready to shape the buns!
And of course, you can always knead your dough by hand, which many professional bakers swear by. Depending on my mood, I sometimes choose this method. It’s a good way to release stress! And best of all, after hand-kneading a few times, you can easily begin to tell when your dough is ready to rise no matter what method you use. It gives you the best “feel” for finished dough.
Rising or “Proofing” your Dough
Once you’ve finished kneading, you’ll need to let your dough rise, or “proof.” Most recipes call for the dough ball to be coated lightly in oil, covered with a light towel or plastic wrap, and set in a warm place until the dough is doubled in size. Most often, I use a large, plastic bowl, with the dough covered by a light towel. I have a spot where the sun warms my countertop and that seems to work well.
Alternatively, if you own an Instant Pot, you can use that as a proofing warmer. Just set the Pot to “Yogurt”, place your dough inside and let it go for about an hour.
Forming Perfect Homemade Sesame Seed Buns
Once the proofing is done, you’ll need to form your rolls. This part is kind of fun – and the only trick is starting out with a very clean counter – no flour or oil residue. This video gives you the perfect technique for that.
Ready for the oven! You’ll love these rolls as hamburger buns or for a hearty sandwich. Enjoy – and leave a comment below if you have a minute.
Homemade Sesame Seed Buns
Ingredients
- 1 Cup Warm Water, divided 3/4 and 1/4 under 110° F
- 3 tbsp Sugar
- 2 1/4 tsp Active dry yeast
- 3 tbsp Butter room temperature
- 2 lg Eggs
- 1 1/2 Cup Whole Wheat Flour, divided 1 and 1/2 cup
- 1 3/4 Cup Bread Flour, divided 1 and 3/4 cup Or all-purpose flour + 3 tsp gluten
- 1 1/4 tsp Kosher Salt or 1 tsp table salt
- 2 tbsp Milk
- 1 tbsp Sesame Seeds
Instructions
- Dissolve yeast and sugar in 3/4 cup warm water. Let stand for 5 minutes.
- Lightly oil a large bowl for dough rising and set aside.
- In a large mixer bowl, combine butter, 1 egg, 1 cup of whole wheat flour, 1 cup of bread flour until moistened. Add water/yeast mixture. If you have a dough hook on your mixer, swap out the beater for the hook. Add salt and knead for about 2 minutes until the batter is smooth.
- Add the remaining 1 1/4 cups of flour, 1/2 cup at a time, to the dough. If the dough feels too stiff, add a tablespoon of water and knead. If the dough is too tacky, add a little more flour until the dough ball is elastic, but still slightly tacky to the touch.
- Form the dough into a ball and place into the oiled bowl, turning once or twice to coat all sides. Cover with a towel or plastic wrap and set in a warm place (about 80° F) until dough has doubled in size – about an hour.
- Punch down the risen dough. Turn the dough onto a lightly floured surface and give a few kneads to make sure all the air bubbles are pressed out. Divide the dough into 8 equal pieces and shape into smooth balls.
- Place rolls on a parchment-lined baking sheet, flattening each ball to a diameter of about 3 inches (7.5 cm). Cover with the dishtowel and let rise in a warm spot for about an hour.
- Preaheat oven to 375°F
- In a small bowl, whisk the remaining egg and milk until smooth with no resistance from the whites. Brush the tops of each roll with the egg/milk mixture and sprinkle with sesame seeds.
- Bake until golden brown, about 15-18 minutes
Easy Hot Milk Cake – Regular and High-Altitude
This Easy Hot Milk Cake brings a cozy and welcoming feel to my kitchen. The…
Boston Cream Pie for Two
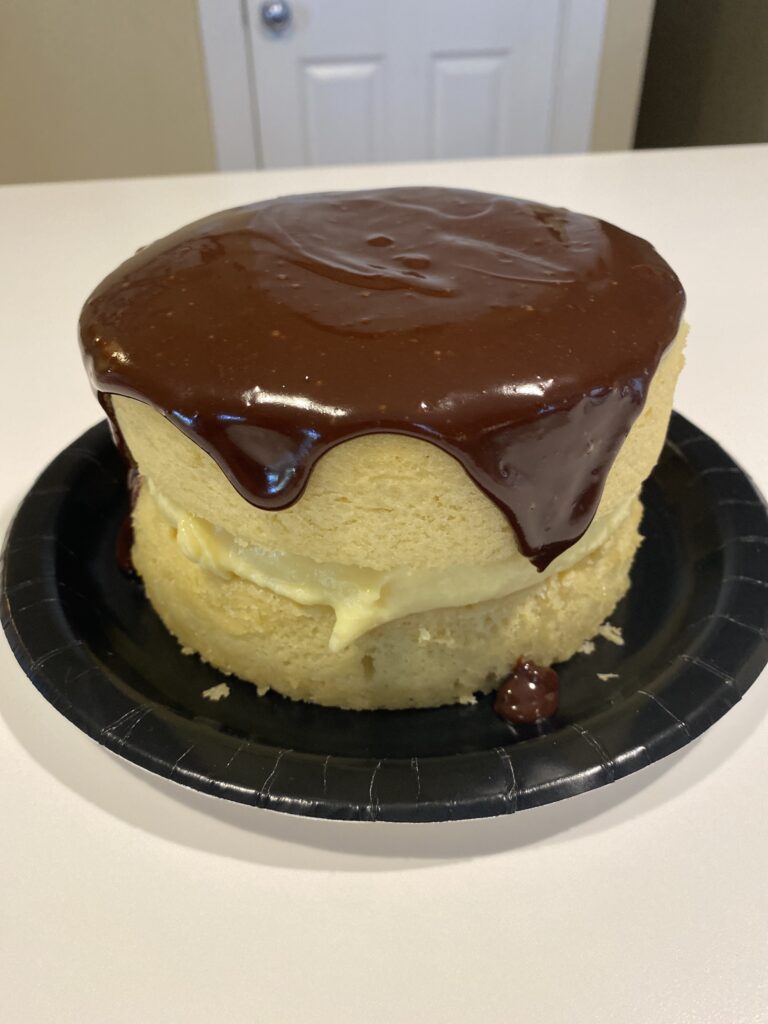
Classic Boston Cream Pie now sized for two – in regular and high-altitude variations. The…
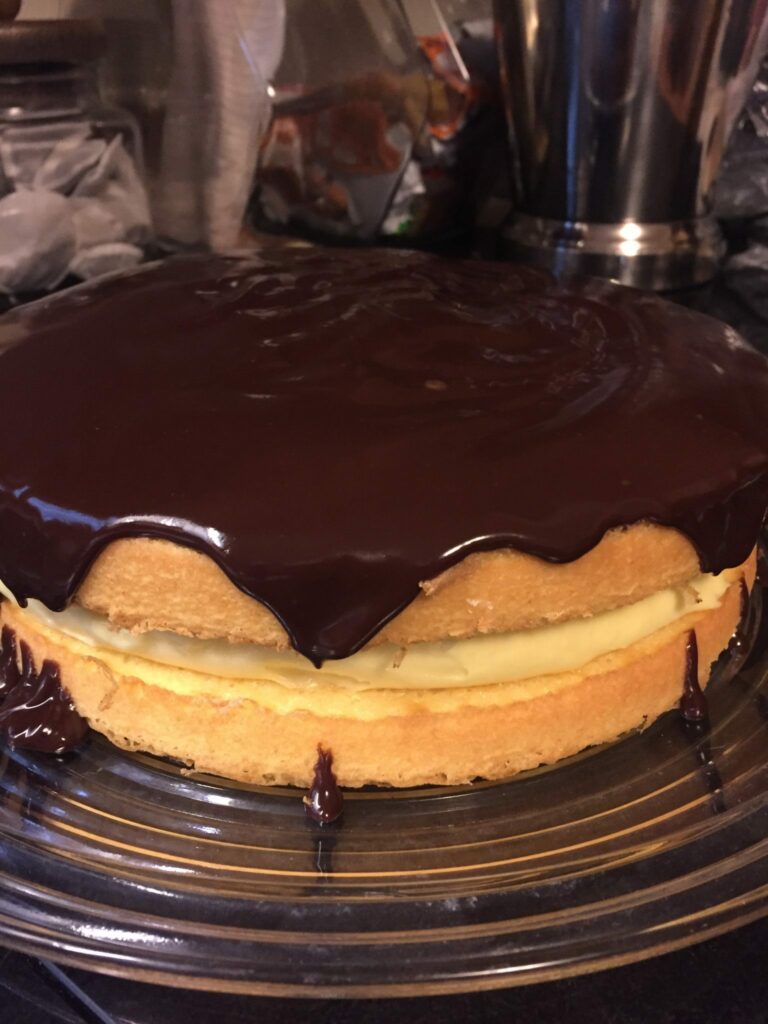
Wicked Good Boston Cream Pie Recipes
Regular and High-Altitude Recipes Included. Wicked Good Boston Cream Pie When a recipe is practically…
Homemade Sesame Seed Buns
Forget those sad, wimpy styrofoam buns from the store. These Homemade Sesame Seed Buns are…
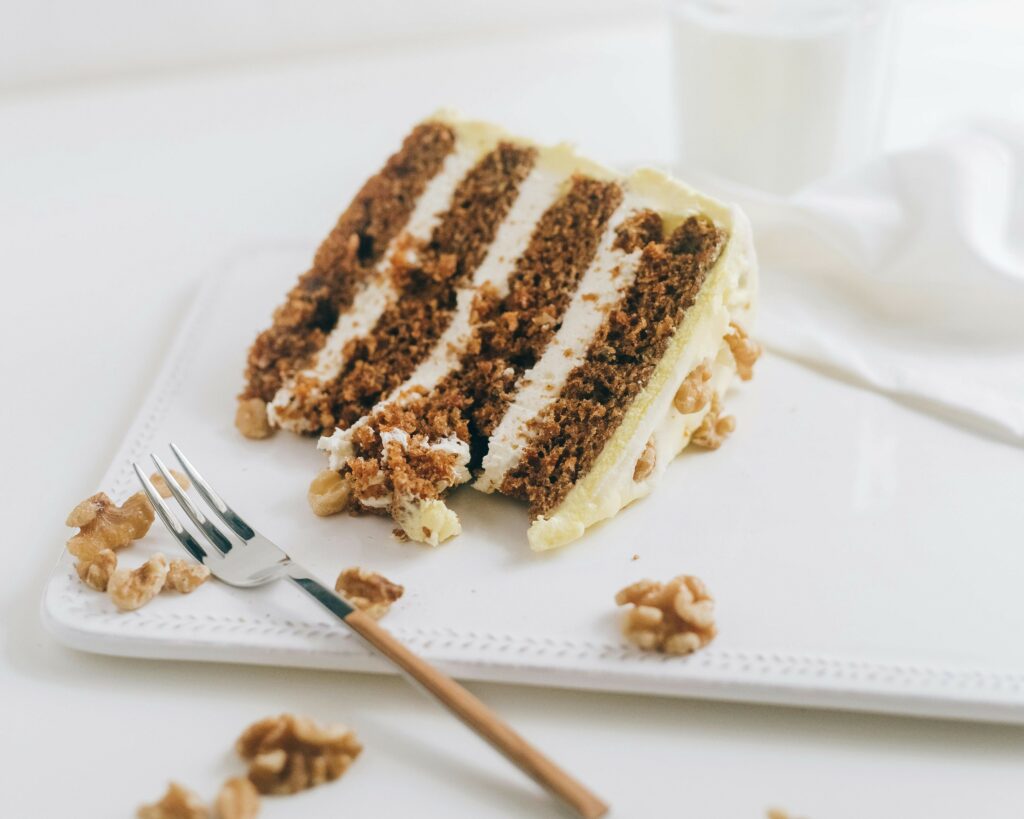
High-Altitude Carrot Cake
Carrot Cake – for most, this cake is really quite simple, even if it has…
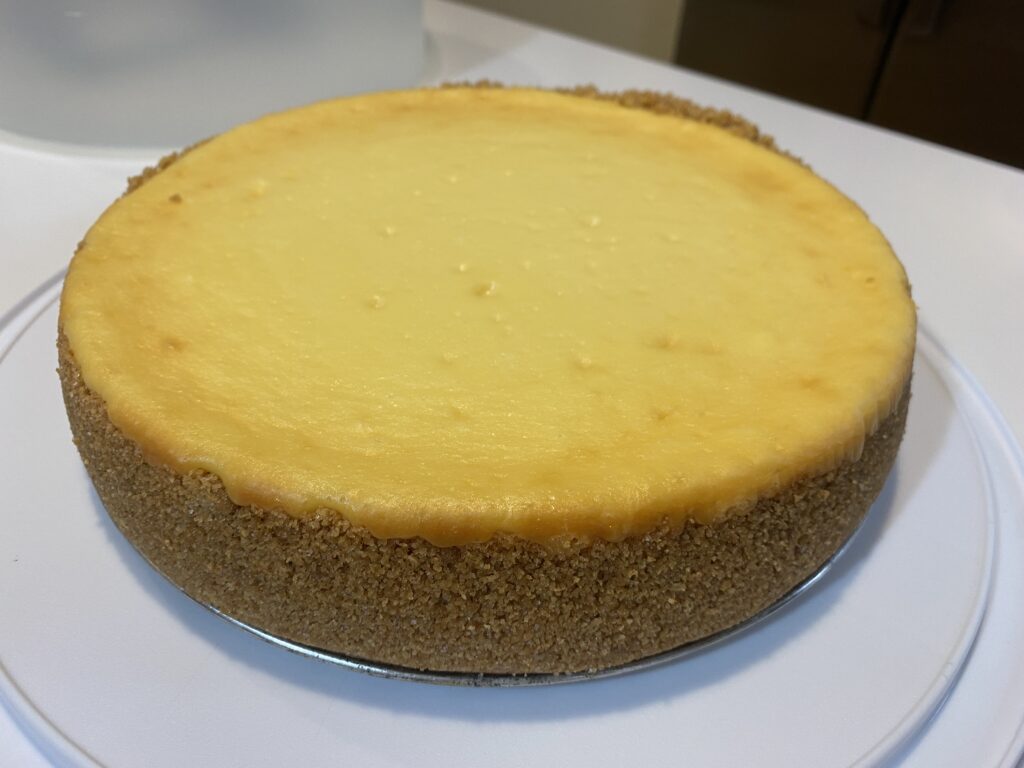
Cheesecake Recipe (No Water Bath!)
If you’ve ever wanted to try baking a New York style cheesecake, but were a…